The most common job on any website, start to finish: create a new page, write a little content, publish it, and add a link to it in your site's main navigation so visitors can find it. About ten minutes, no experience needed.
Please consider the environment before printing.
Before you begin
You need a login to your site's dashboard with permission to edit pages and menus. If you can see Pages and Menus in the left sidebar after you log in, you are set. If one of them is missing, ask your site's Content Admin to add the permission.
Have a rough idea of what the page is for and what visitors should click to reach it. In this walk-through we will make a page called Trash & Recycling and add it under Residents in the main navigation — swap in your own page name and menu spot as you go.
Two tools do the whole job, and both live in the left sidebar. Left menu › Pages is where pages are made. Left menu › Menus is where you decide what appears in the navigation. A page can exist without being in a menu (people could still reach it by its address), but until it is in a menu, nobody will find it by browsing — so this guide always does both.
1 Create the page
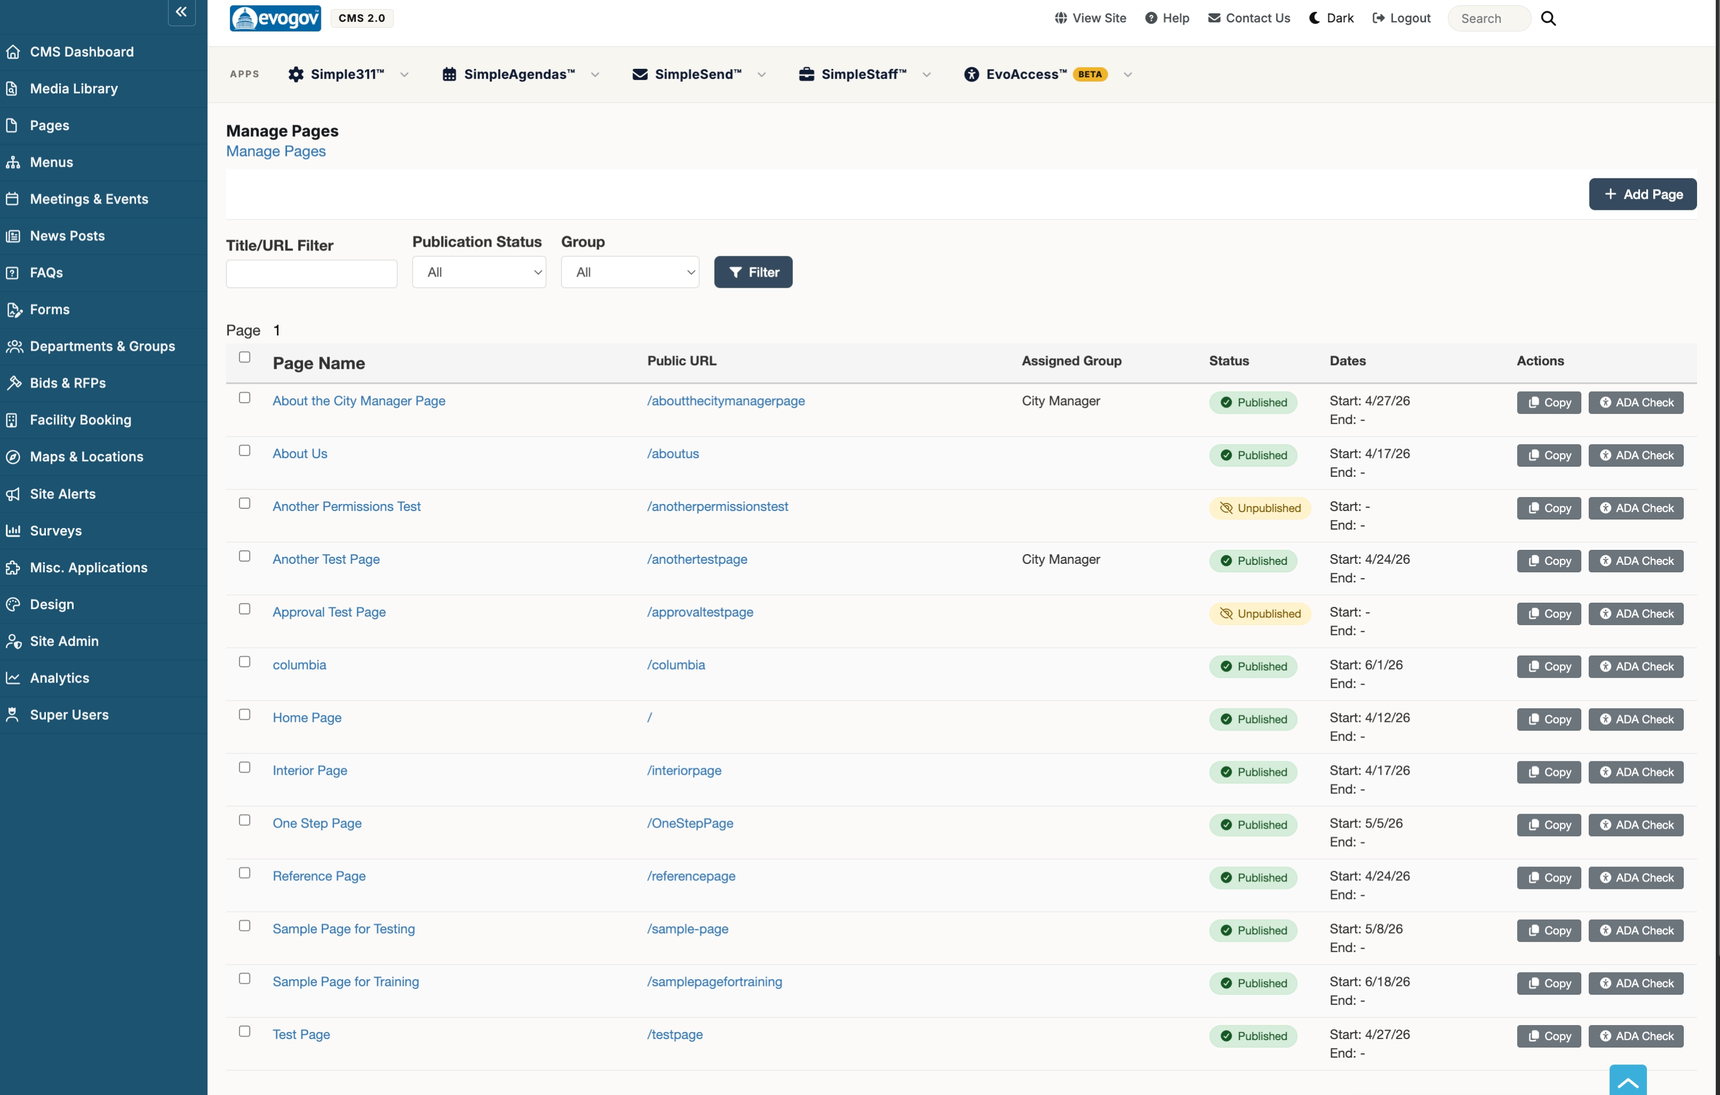
In the left sidebar click Pages. This opens the Manage Pages list — every page on your site, with its publish status and when it was last updated.
Manage Pages lists every page. The Add Page button is at the top.
Click Add Page. A small Add a new Page box asks for a Title. Type the name visitors should see — for our example, Trash & Recycling — and continue. The full page editor opens with your new, empty page.
Shortcut: From any dashboard screen you can also use the + New button in the top bar and choose Web Page. It goes to the same place.
2 Add some content
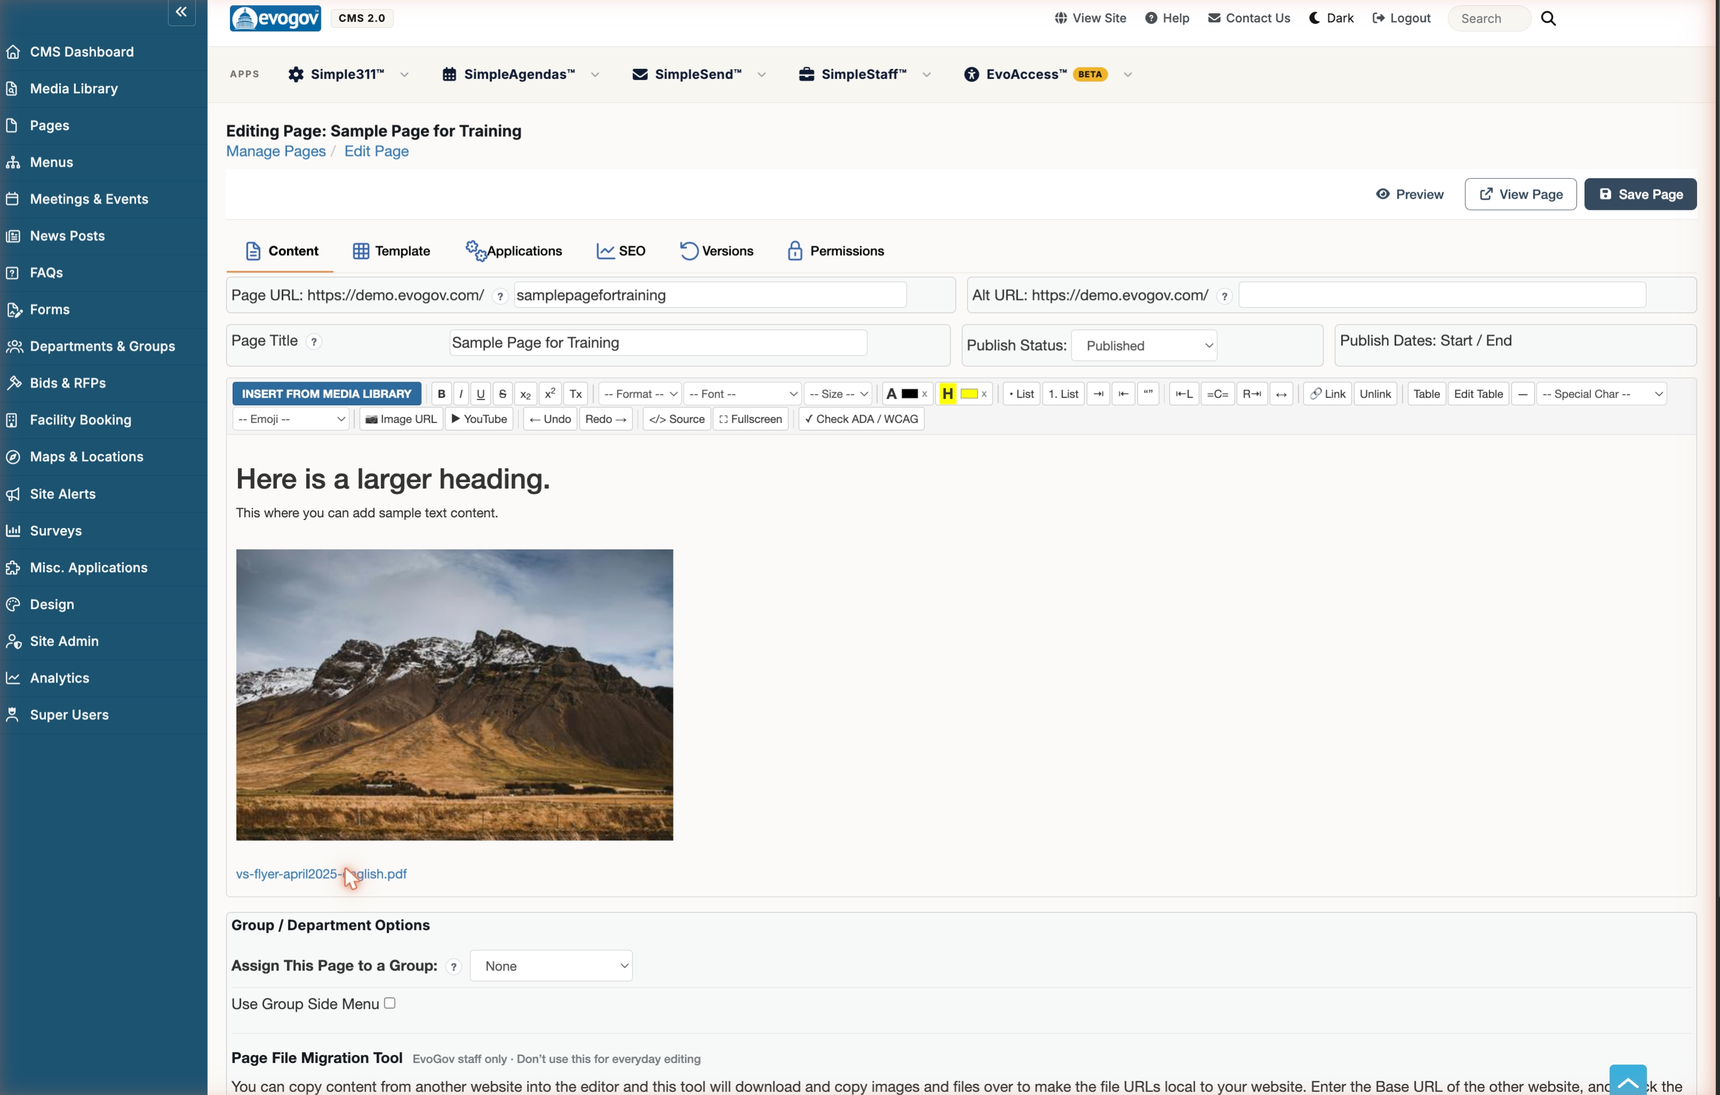
You are now in the page editor. The big white area on the Content tab is where the page's text goes. Click into it and type, just like a word processor. A short paragraph is plenty to start — you can always come back.
The page editor. Settings are at the top; your text goes in the large area under the toolbar.
The toolbar above the text works like the one in your email or Word: B for bold, the Format dropdown to turn a line into a heading, the chain-link icon to make a link. If you want to add a photo or a PDF, the blue Insert From Media Library button at the far left of the toolbar does that. Every button is explained in the Page Editor guide.
Click Save Page whenever you like — saving does not put the page on your public website yet. That is the next step.
Pasting from Word? That is fine. Paste it in, then use the Format dropdown to set any headings, since Word's styling does not always carry over.
3 Check the address and publish
Near the top of the editor, look at two settings:
Page URL — the last part of the page's web address, after your site's name. It was filled in from your title automatically (our example becomes something like trash-recycling). You can leave it, or shorten it. Letters are made lower-case and spaces become hyphens.
Publish Status — a new page starts out hidden from the public. Change it to Published when you are ready for visitors to see it.
Set the status to Published and click Save Page. Your page is now live at its address — but it is not in any menu yet, so let's fix that.
Not ready to go live? Leave the status as it is, do the menu steps below anyway, and turn the menu item's Hide option on. When the page is finished, publish it and un-hide the menu item.
Reviewer permission: On some sites, only people with the reviewer role can publish. If the Published option is not available to you, save the page and ask a Content Admin to publish it, then carry on with the menu steps.
4 Open your main menu
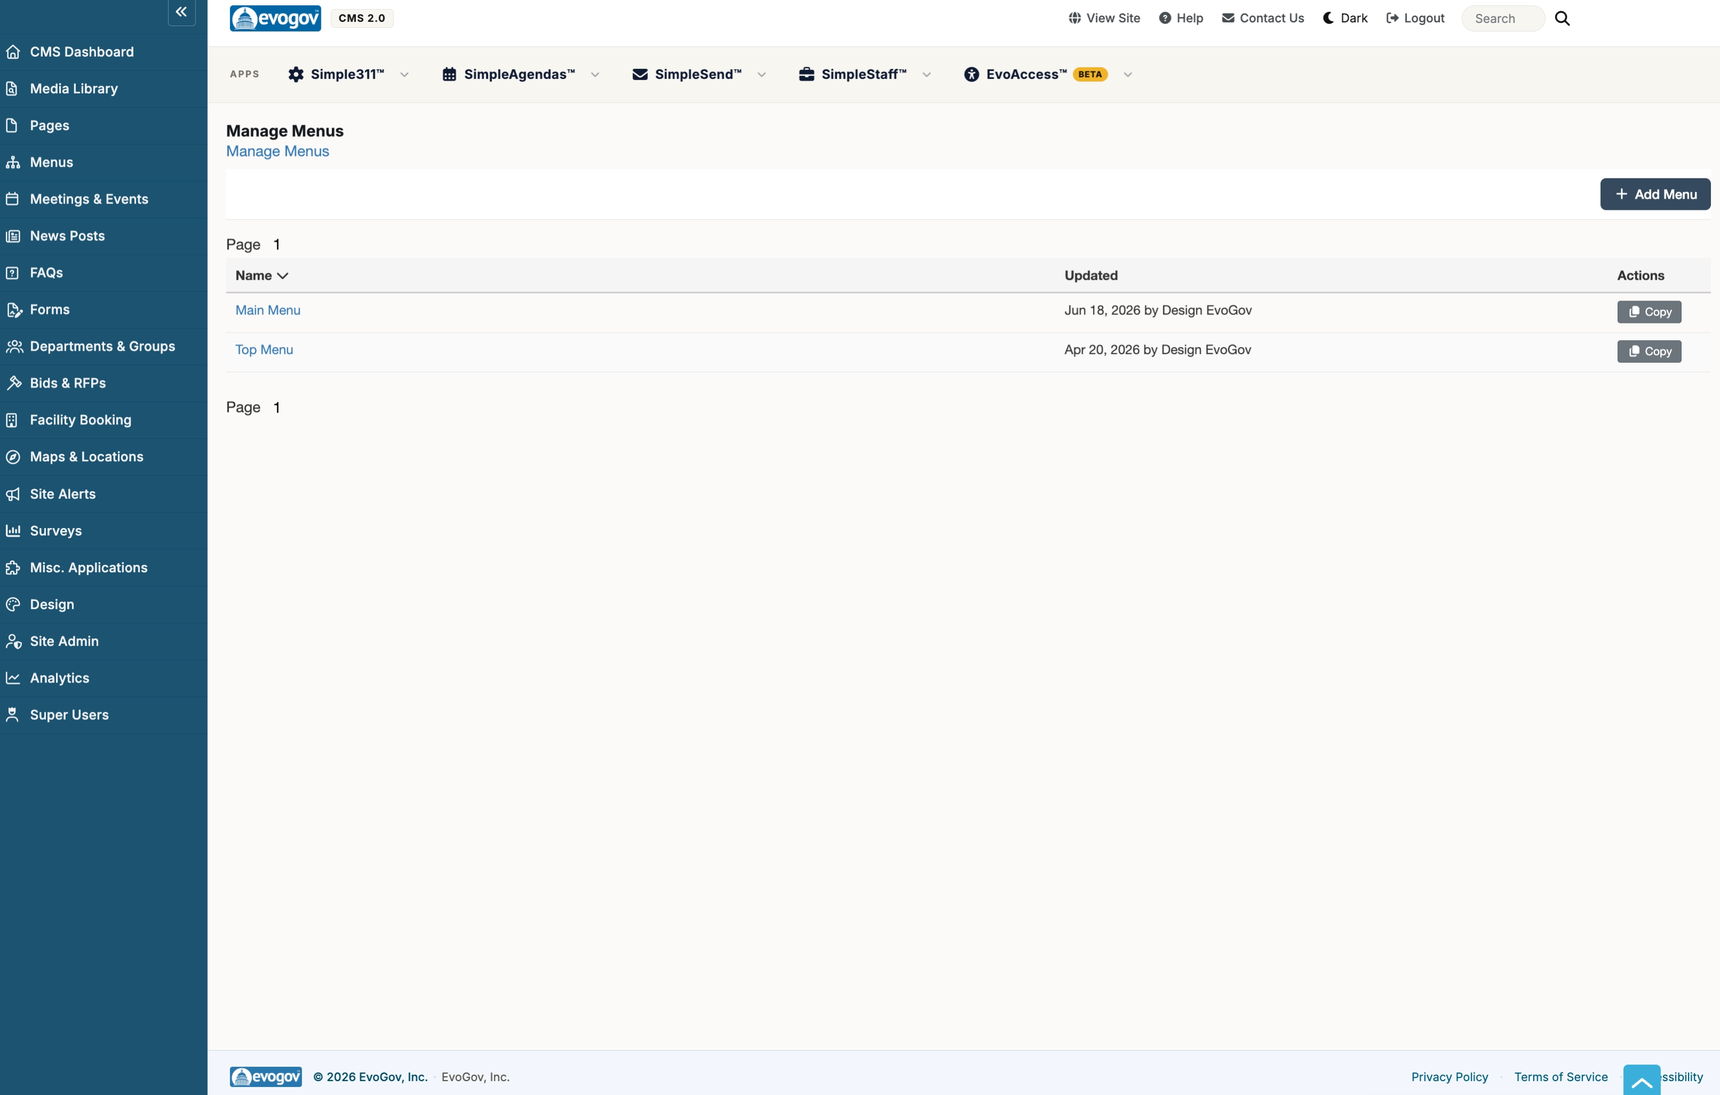
In the left sidebar click Menus. The Manage Menus screen lists every menu your site has. Most sites have one main navigation menu (often called Main Menu or Main Navigation) plus a few smaller ones for the footer or a sidebar.
Manage Menus. Click the name of your main navigation menu to open it.
Click the name of the main navigation menu to open it. You will see the list of links that make up your site's top navigation, in the same order they appear on the website.
Not sure which menu is the main one? Open your public website in another browser tab and look at the links across the top. Then open each menu here until you find the one whose items match. Do not create a new menu for this — a new menu is not automatically shown anywhere on the site.
5 Add the page to the menu
Click Add Item. A pop-up titled Menu Item opens. Across its top is a row of content types. Click Page.
A list of your site's pages appears. Find the page you just made and click it. The menu item is now tied to that page — if the page's address ever changes later, the menu link follows it automatically.
Check the Link Label box. It is the wording visitors will see in the navigation, and it was filled in with the page title. Shorten it if it is long — menus have limited room, so Trash & Recycling is better than Trash, Recycling and Yard Waste Information.
Click Apply. The pop-up closes and your new item appears at the bottom of the list.
Screen readers: if the label is short or abbreviated, put the full wording in Aria Label before you click Apply. It is read aloud to visitors who use assistive technology and does not change how the menu looks.
6 Put it where you want it and save
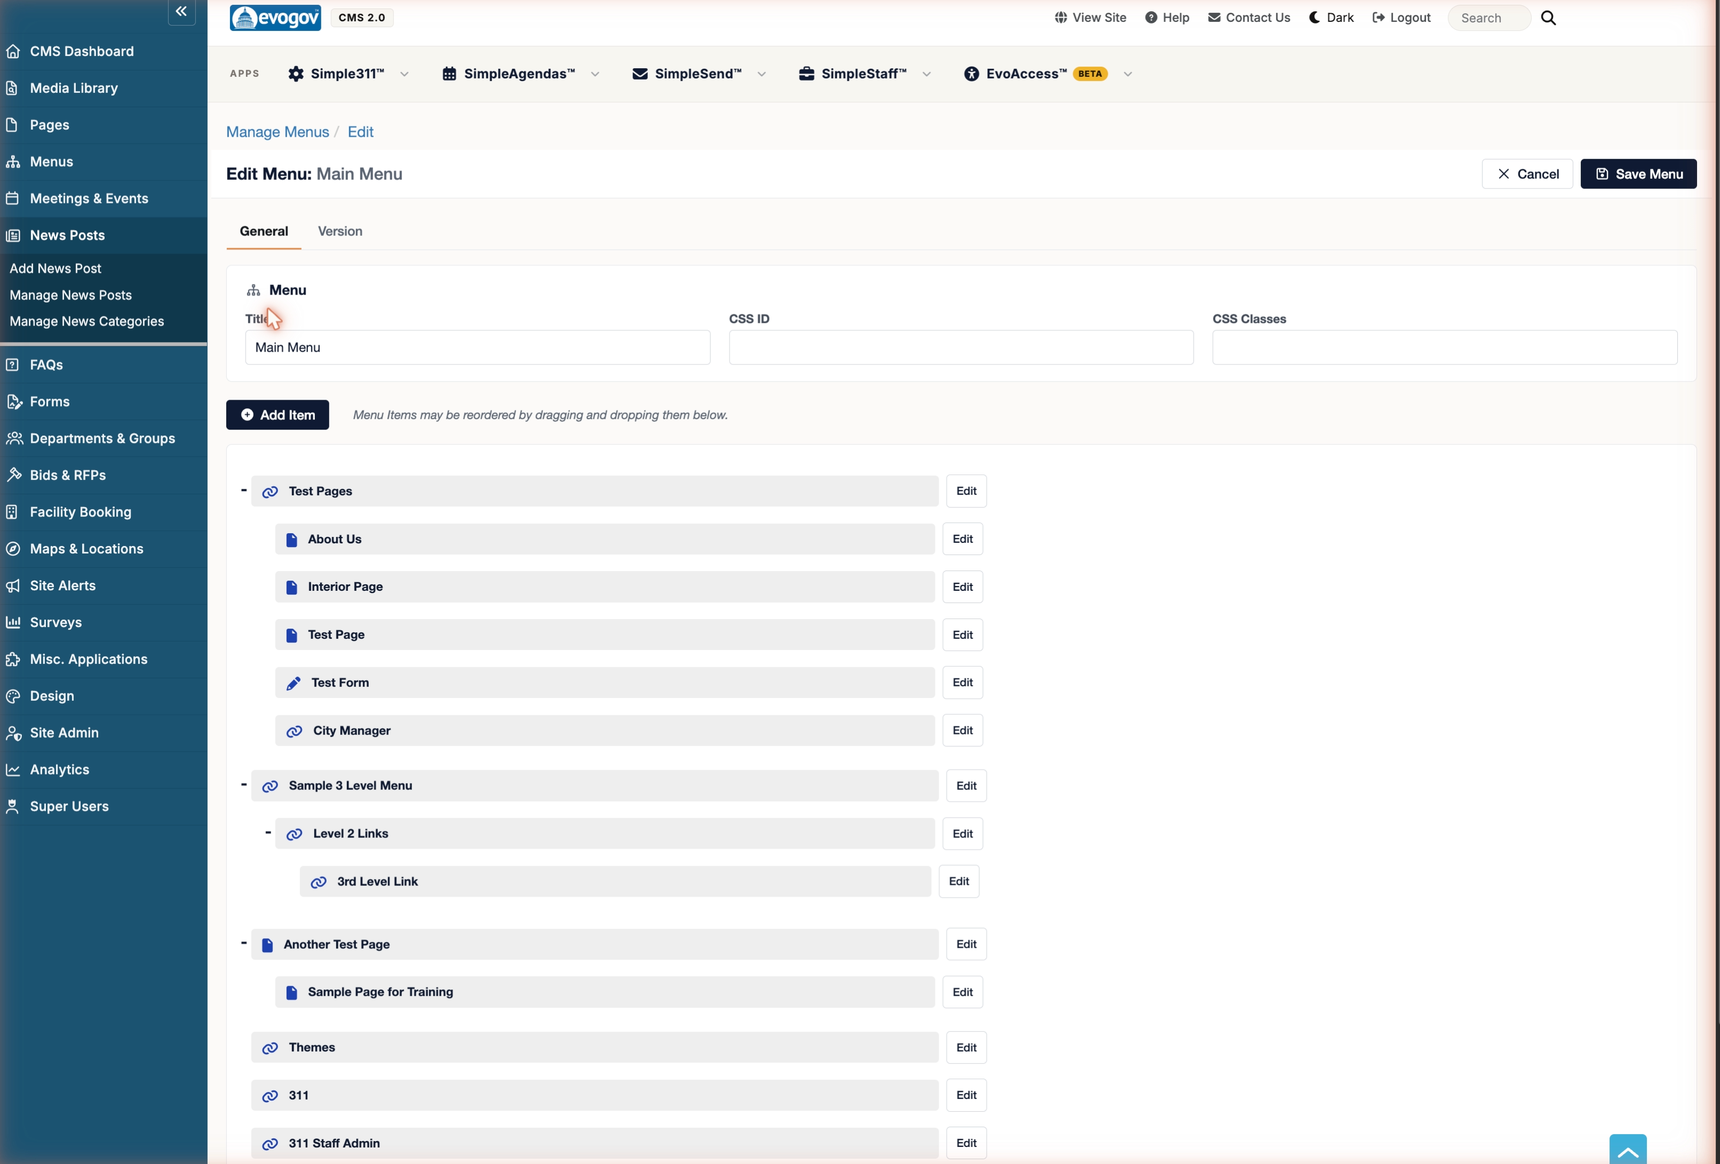
Your new item is at the end of the list. Drag it up or down to change where it sits in the navigation.
To put it inside a dropdown — for our example, under Residents — drag it so it sits just below the Residents item and slightly indented to the right. The indent means it is now a sub-item of Residents. If dragging is fiddly, click the item's Edit pill instead, pick Residents from the Parent dropdown, and click Apply.
The menu editor. Indented items are dropdown sub-items of the item above them.
Now the important part: click Save Menu. Nothing you did in the menu editor reaches the website until you save.
Careful: If you see the reminder "Changes will not be saved until Save Menu is clicked" and you leave the page, your new item is lost and you will have to add it again. Save Menu first, then leave.
7 Check it on the live site
Click View Site in the top bar of the dashboard to open your public website. Find your new link in the navigation and click it. You should land on the page you made, with the content you typed.
That is the whole job. From here on, editing the page is just Left menu › Pages, click the page, make changes, Save Page. The menu link keeps working.
If something looks wrong
What you see
What to do
The link is in the menu, but clicking it shows "page not found" or an empty page.
The page is probably not published yet. Open it under Pages, set Publish Status to Published, and Save Page.
The page is published, but the link does not appear in the navigation.
Either Save Menu was not clicked, the item's Hide option is on, or the item went into a different menu than the one shown at the top of the site. Open the menu again and check all three.
The link is there but it is at the top level instead of inside the dropdown (or the other way round).
Open the item's Edit pill and set (or clear) the Parent, then Apply and Save Menu.
The site still shows the old navigation a minute after saving.
Reload the public page. If you use the View Site button it should show right away; a plain browser refresh takes care of the rest.
The page's web address has a number on the end, like trash-recycling-2.
Another page already uses that address. It still works; if you want the clean version, find the older page under Pages and archive or rename it, then edit the Page URL on yours.
Next steps
Everything above is the short version. When you want more:
The Pages guide covers scheduling a page to go live on a date, assigning it to a department, and the Empty Page Report.
The Page Editor guide explains every toolbar button, including images, tables and document links.
The Menus guide covers icons, links to outside websites, "stub" headings that only open a dropdown, and building a brand-new menu.
Get your photos and PDFs into the Media Library so you can drop them into pages.
Need a hand? Contact EvoGov support or visit
help.evogov.com.